
Miro is a powerful whiteboard tool that can really enhance your workshops. This guide provides the basics on creating a board, organising and sharing your board, as well as navigation and some of cool features of Miro.
How to Create a Board in Miro

The Dashboard is the first screen you will see after you login.
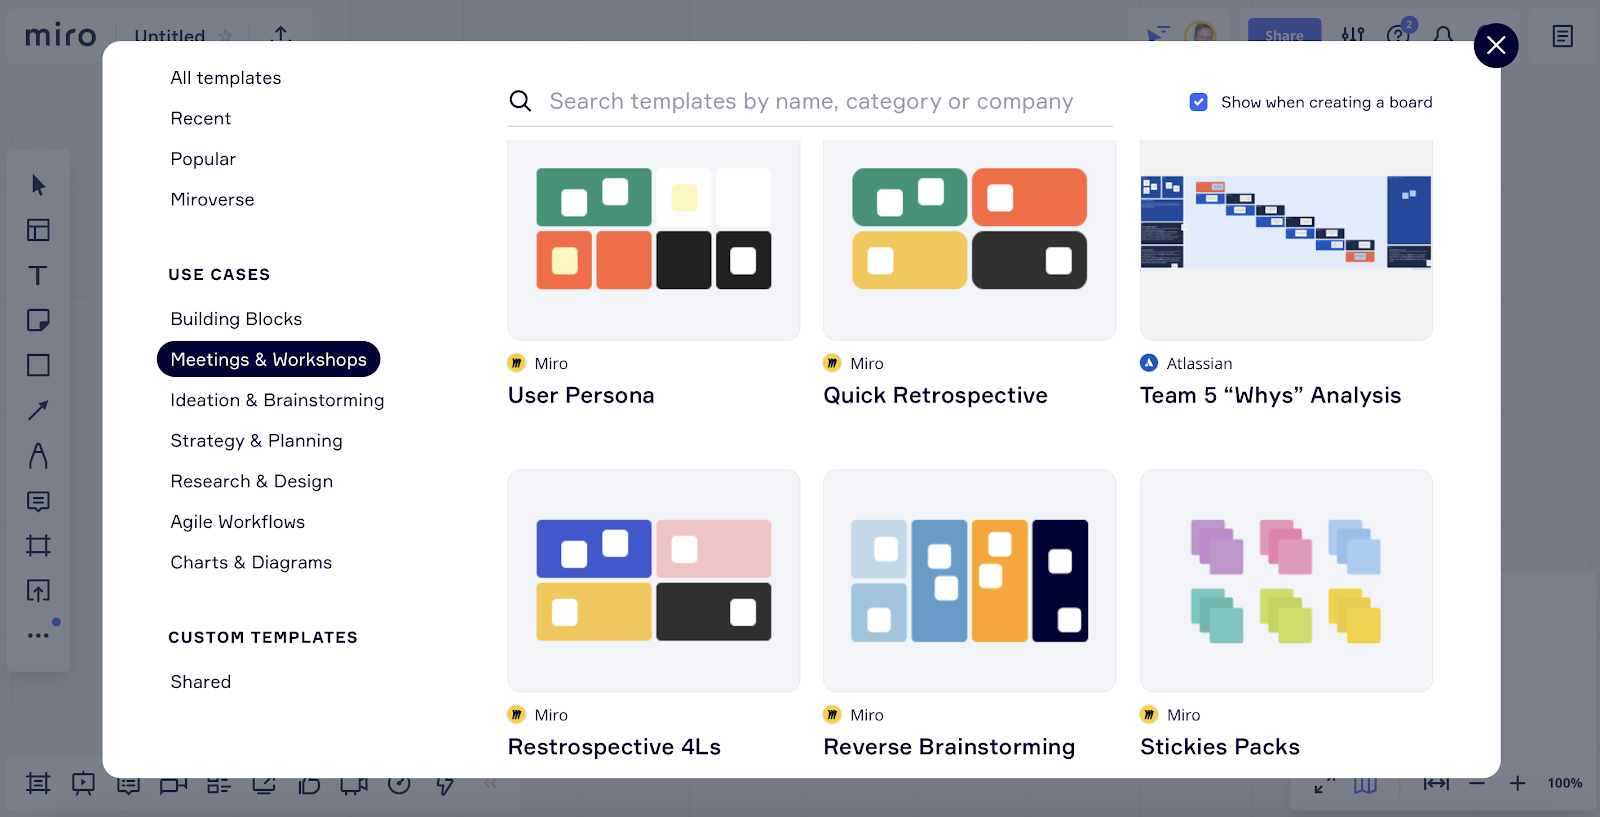
To create a new board you can click on the ‘New Board’ button, which will open up a screen showing the many Miro templates. Your choice from here depends on what you need the board for. If you’re planning a workshop, then think about what you plan to do in the workshop – is it a brainstorming sessions, a retrospective, working on strategy or planning, etc.

Under each of the categories there are more templates for boards. A good example of a category is Meetings and Workshops, which contains a good selections of boards for different types of meetings – for a meeting to do some 5 Whys Analysis into a question or an issue, Brainstorming, User Persona creation or you can start simple with a board of sticky notes.
If you prefer, you can start with a blank board, and you will be shown the default drawing tools.
How to Add New Templates to an Existing Board
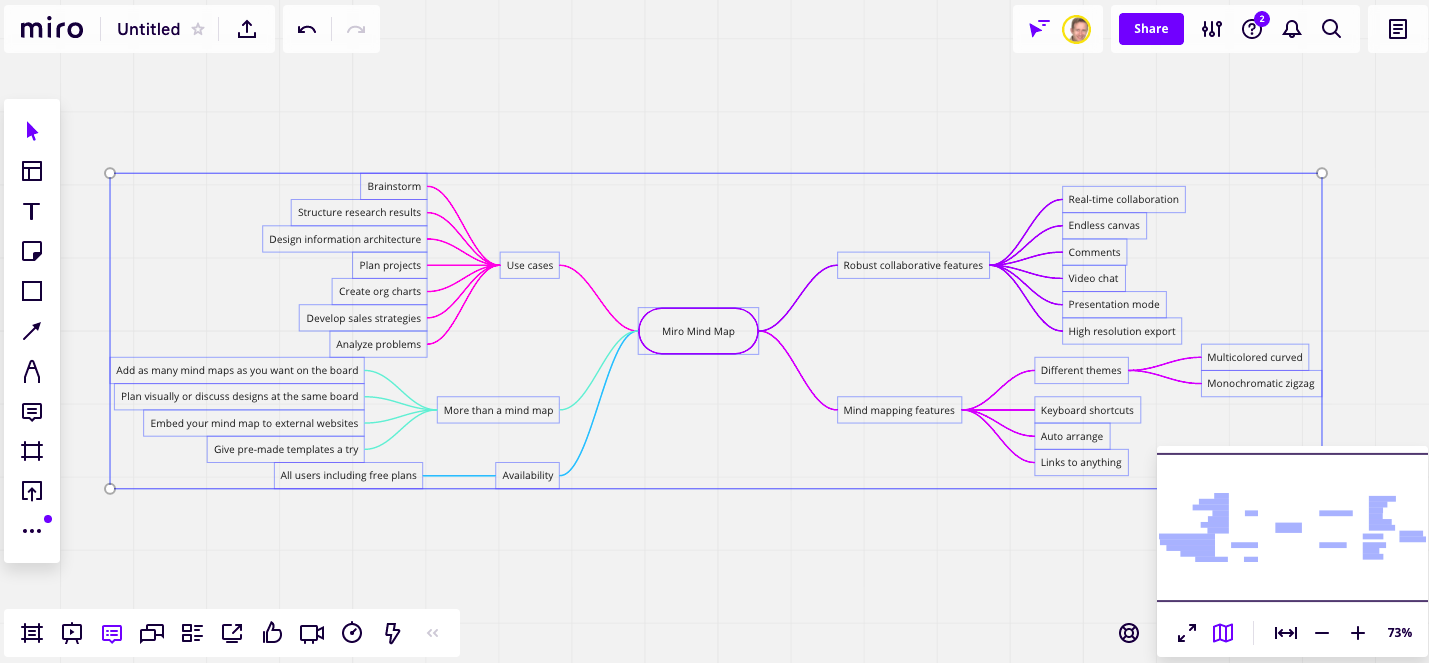
The beauty of Miro is that the templates you are shown at the beginning can be added to the board at any time. Miro has what they like to call an infinite canvas, so even if you start with a blank canvas, or another template, you can add another template to the canvas when you need to. This means that if you’re having a productive workshop with the team, you don’t have to keep switching canvases when you need a new template, you just add it to the one you’re work with – you can keep the flowing of ideas and collaboration running!
You do this by clicking the templates button from the vertical menu on the left hand side.

In this example you can see I’ve added a flowchart to the mind map on the canvas, and all it took was a few clicks!
Apart from the templates, you do get a set of drawing tools that allow you to start from a blank canvas and create your own.
How Do I Share My Miro Board With Others?

The simple answer is you click on the ‘Share’ button towards the top right hand side of the screen. When you click it you will see this window pop up onto the screen, which shows the options available to you when sharing the board.
How Do I Organise my Miro Board? Use Grids
As your team start adding content to your board it might seem a bit unorganised. This can be as you let your board evolve organically, driven by the creativity of the team. However, if you feel it is getting a bit unreadable or unusable, you can make use of Grids. Add a Grid to your board from the vertical menu on the left hand side, and place the content in the boxes in the Grid.


Chat, Comments, Voting, Timer and Presentation Mode
At the bottom left hand side there is another menu with a range of options. If you think of the vertical menu as drawing options, and things you can add to the board, the bottom menu are option that help you collaboration and run a workshop. Some of these features are:
- Frames: Creating a frame helps you group contents on the board, limit the size of a particular part of the board (for exporting, for resizing a part of the board, to help with presentations). The frames then act a bit like pages – you can move an entire frame and everything in it around on the board.
- Comments: View and manage the comments made by the team on the board.
- Chat: Chat with the team as you work on the board.
- Video Chat: Chat with your team using video.
- Voting: Helps facilitate a voting session regarding particular options on the board.
- Activity: See what has been changed on the board, and by whom.
The Options Menu
At the top right of the screen is an options menu. Here you will find the Share button, Help, and the settings drop down.

There is a lot to explore in Miro. This article gives you just bit of information to get you started with Miro. I hope you have many great workshops with Miro!
